DIY Sliding Laundry Cabinet

That before picture…eeeeeeeek. That was the view that greeted me every time I entered my bedroom. I already hate doing laundry (who doesn’t?) so watching it pile up here—day in and day out. every. single. time. I walked into my bedroom—was definitely not the business. Unfortunately though, this area is the only space we have for our laundry bins so we couldn’t move them. Instead, I got clever. I did what all kids do when their mom tells them to clean up the messy, stinky, eyesores from their room—I hid them.

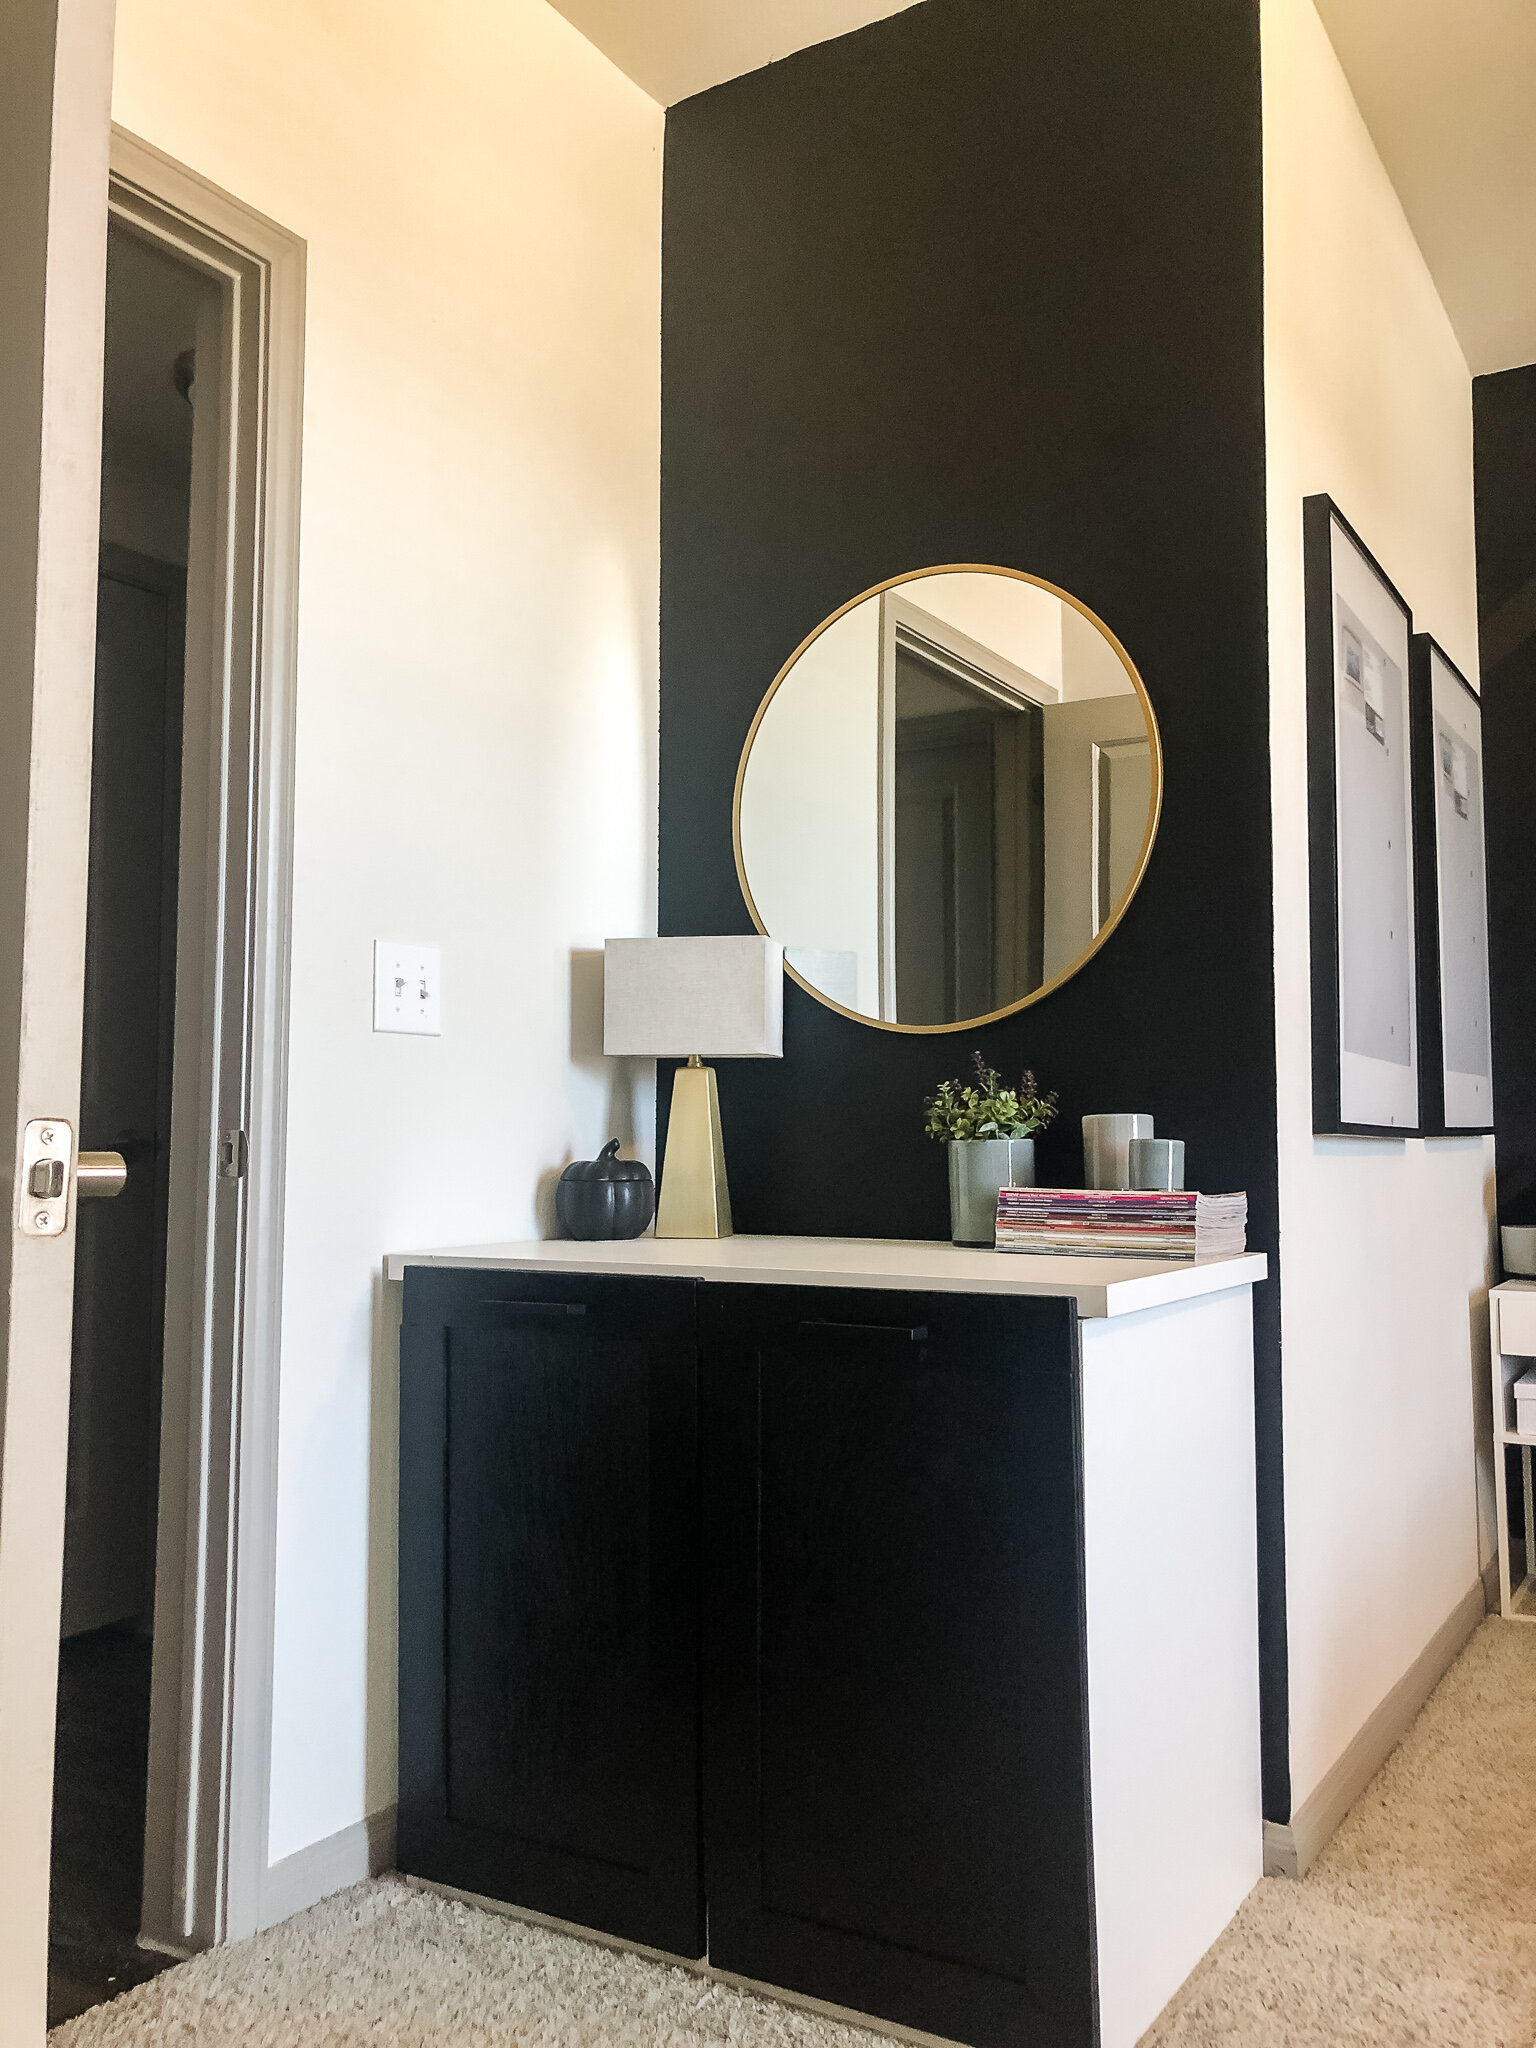
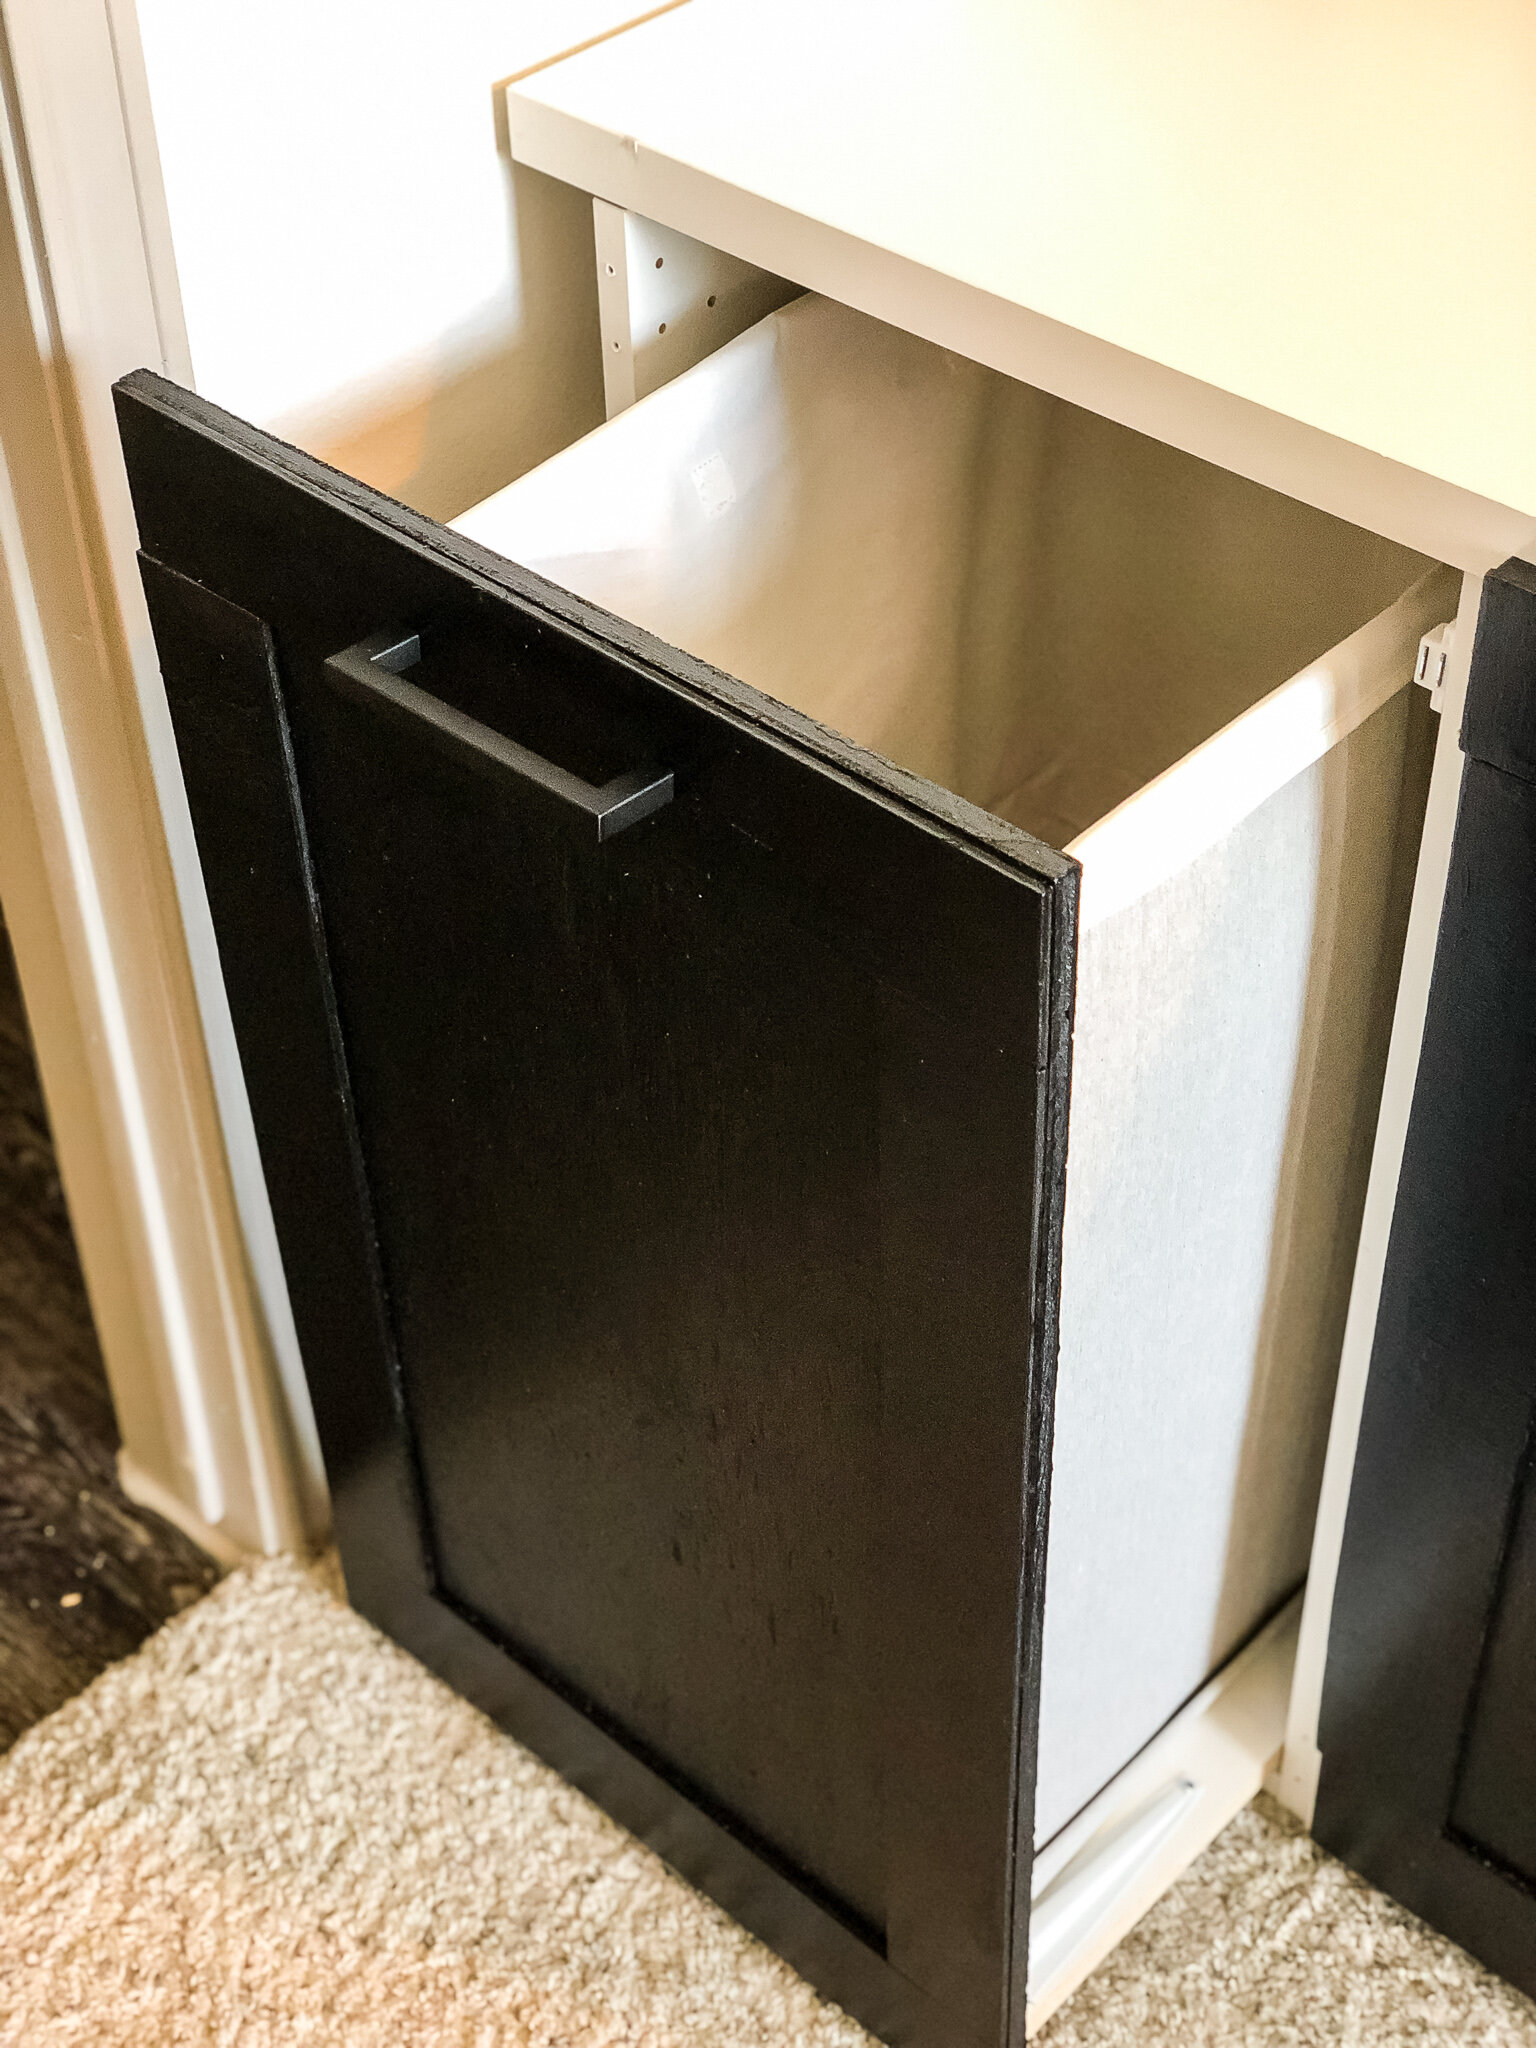
Ahhhhhhhh. Now isn’t that much better? We’ve got hidden laundry storage and a nice little dressing table all-in-one. The cabinet base slides out to allow you to throw your clothes in the hamper and then conceals it all nicely under the tabletop. And because I already know you’re wondering, here’s how I did it…
DIY Easy hidden laundry storage
Quick disclaimer: this post contains affiliate links. By using them to make a purchase, I may receive a small commission at no extra cost to you. Thank you in advance for contributing to my blog and supporting my Target addiction ;)
tools:
Drill
Screwdriver
Paintbrush
MATERIALS:
2 - IKEA Sektion base cabinets (18x24x30”)
IKEA Sektion shelf inserts (2 pack) (18x24”)
IKEA Linnmon table top (40x24”)
2 - Bottom mount drawer sliders (22”)
Wood for the drawer fronts — I used 1/2“ plywood for the main part and 1/4” plywood for the trim
Small screws
4 - Shelf brackets
Liquid nails
Caulk
Caulking gun
Paint — I used leftover matte paint from my striped accent wall project
2 — Laundry hampers
make it happen:
(1) Assemble your base cabinets.
Pro Tip: Check IKEA’s As-Is section first—they always have a bunch of Sektion cabinets from when they do floor set swaps. I only live about 15 minutes from my IKEA store so I kept checking back to see if they’d As-Is’ed the size I needed. I lucked out and was able to get two already-assembled cabinets for $40 total (regularly $50 each).
(2) Screw in your table top.
Center the tabletop on top of the two cabinets. Now stick your head into the cabinet (stay with me here people) and locate the oval shaped holes in the metal brackets. It’s easiest to just go ahead and lay down on your back so you’re looking up at the underside of the tabletop.
Drill two small pilot holes into the base of the tabletop through the oval shaped opening. The tabletop is hollow, so be careful not to drill all the way through to the other side. Then screw your tiny screws into each of the pilot holes to keep the tabletop from sliding on top of the cabinets.
(3) Attach drawer sliders.
Lay your shelf inserts on the ground upside down with the front (white) side of the insert closest to you. Place your closed drawer slides upside down on top of the shelf inserts, with each about 5 inches from the outer edges of the shelf. The back end of the slider should be flush with the back of the shelf when closed, and extend past the shelf when open. This will leave you with a couple inches of space in the front of the shelf. Drill pilot holes and fasten the slider to the shelf with 2-3 screws.
(4) Attach the sliders and shelf to the cabinet.
Turn your shelf insert right side up (slides down) and place it inside the cabinet. Extend the base of the sliders so they are touching the back of the cabinet. Drill pilot holes and screw the sliders into place on the base of the cabinet. Once this is done, you should be able to slide your shelf insert in and out of the cabinet.
(5) Assemble cabinet fronts.
Side note: I couldn’t decide if these would be considered doors or drawer fronts? Cause they’re big like doors, but the whole thing slides out like drawer…so, they’re like, droors?
Cut two 18x30” pieces of 1/2'“ plywood for the main part of the drawer front. Then use your 1/4” plywood to make your Shaker style trim pieces. You’ll need 4 pieces that are 3x18” and 4 pieces that are 3x24”. Sand the face and edges of all of your wood using a fine grit sanding paper.
Next, dry fit your trim pieces on the cabinet drawer fronts to make sure everything lines up correctly. Once every thing looks good, apply a thin line of liquid nails to the back of each trim piece and set it in place. After you’ve glued all of your trim pieces, use clamps or a heavy object to hold them in place over night.
After the glue has dried and the trim is attached, fill any small gaps between the trim pieces with caulk. Let the caulk dry completely and then paint 2 coats of paint onto the front and back of your cabinet drawer fronts. After the paint is completely dry, apply a thin layer of clear wood finish to the face of the cabinet front. Let the cabinet fronts dry completely.
(6) Attach cabinet fronts to the sliding shelf.
Extend the sliding shelf and align the cabinet front with the front of the shelf. If you’re working along, you’ll need to use an extra piece of wood or other thick material as a shim to prop up the cabinet front to the correct height. The base of the cabinet front should be aligned with the shelf, not the cabinet itself to keep it from dragging on the floor when sliding.
When centered and aligned correctly, the cabinet front should have about XX” of over hang below the shelf and .75” on either side of it.
Once the two pieces are aligned, line up the shelf bracket between the two on the outer edge . Drill pilot holes into each piece and screw them together.
(7) Attach the drawer pulls.
Place piece of painters tape across the top of the upper cabinet front trim. Mark the center point. Align your drawer pull template with the center point and decide where to place you want your drawer pull to be placed. Drill pilot holes and then screw in your drawer pull.
*For more detailed instructions on using the template, read this post!
(8) Add your laundry hampers.
For the last step, place your laundry hampers inside the cabinet and rejoice! Laundry days just got a whole lot cuter!

After I finished my cabinet, I styled the dressing table with a few things I had around the house—the old lamp from my nightstand, magazines, and a few vases. I also picked up an ever popular round mirror at Target to make the area a functional space for getting dressed. Now it’s perfect for getting ready in the morning or setting your purse down when you come home. Best of all, no one will ever know it’s hiding all of my dirty laundry ;)


With this project wrapped, I’m soooo close to finishing my Moody Master Bedroom — One Room Challenge I can taste it! Everything is really starting to look just like I designed (and less like a construction zone) and I couldn’t be happier. I have a couple more DIYs coming soon, like my bed frame and bookcase doors, but you can check out this week’s progress right here :)